
Live view
Open any camera to watch it live.
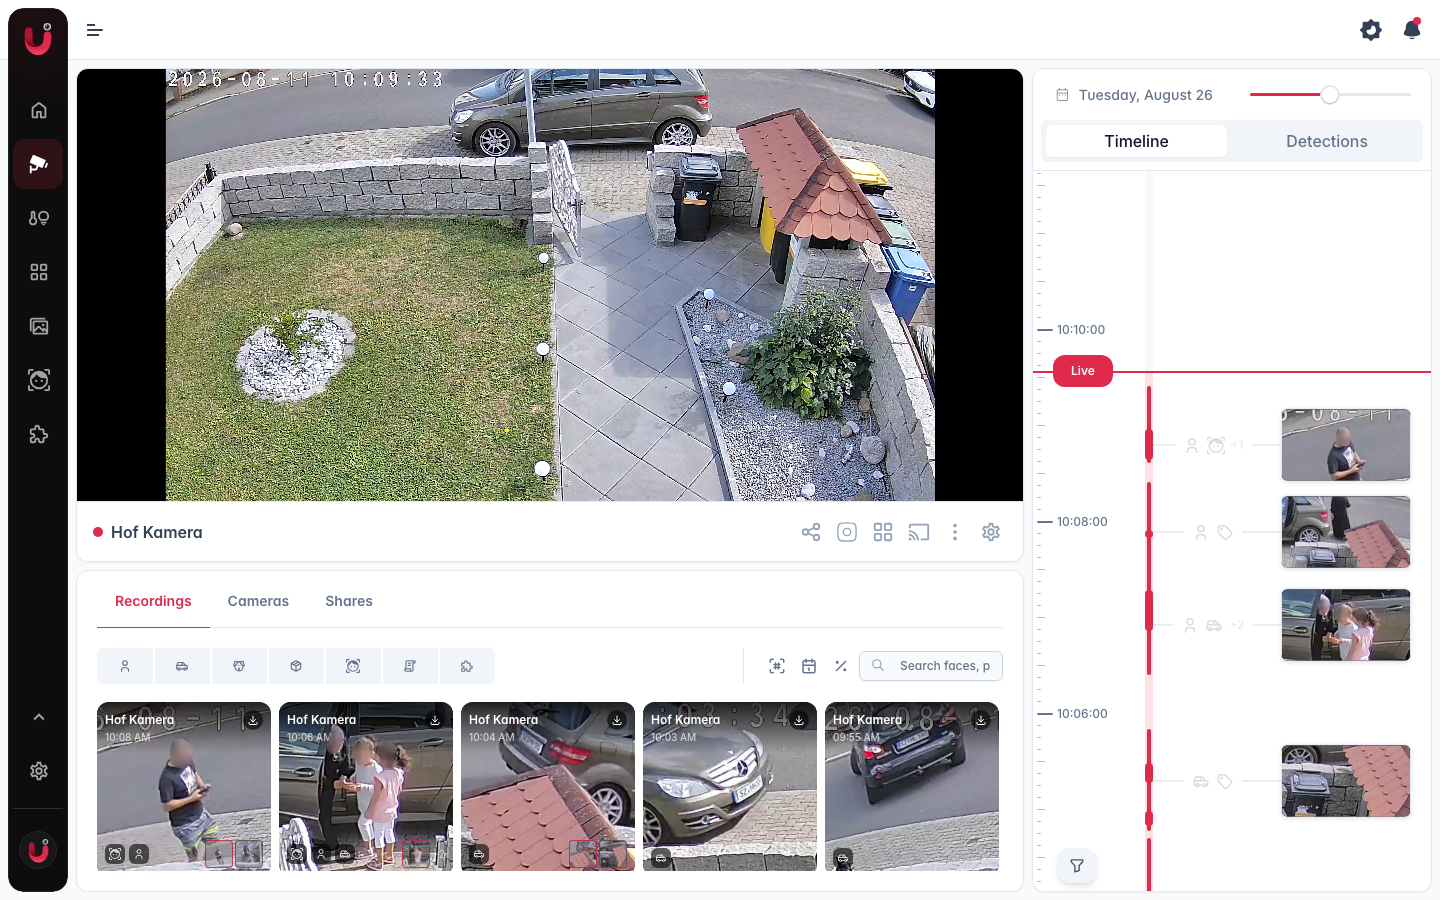
Player controls
- Play / pause the live stream.
- Mute / unmute for cameras with audio.
- Two-way talk to speak through the camera (see below).
- Fullscreen and Picture-in-Picture to pop the video into a floating window. In fullscreen the dots in the control bar switch Shortcuts, the Timeline over the video and the PiP Source overlay. On a phone held upright, the timeline sits at the bottom of the screen, below the picture.
- Digital zoom by scrolling or pinching, up to 5×, with a minimap. Drag to pan when zoomed in. The crop holds while you scrub the timeline, until you double-click the picture or zoom back out.
- Quality switches the source resolution (High, Mid, or Low Resolution).
- Open camera opens the full camera page with recordings and the timeline.
When you review recordings, the player also offers rewind, fast-forward, and playback speed. See Timeline & playback.
Detection boxes
With Detections on, the player draws a box around everything the camera currently sees, with the type, the confidence and the track number. A camera that reports a detection without a position gets no box.
An object that has settled, a car parked in the driveway or a bin left at the kerb, keeps its box but gets a faded label and a timer counting how long it has been standing there. A settled object triggers no new events and no notifications, see stationary objects. It goes back to a normal box as soon as it moves again. On a small card the labels are left out and only the box remains.
Two-way talk
The Intercom button sends your microphone to the camera's speaker, on cameras that support two-way audio.
Second stream overlay
Give a source a PiP Source in the camera settings (Sources tab) and the player gets a Toggle PiP button. It shows that second stream as a small overlay on the video. Click the overlay to swap the two streams.
The PiP Source can also be a stream of another camera, the list groups them by camera. That fits a second lens of the same device, such as the tele lens of a dual-lens camera added as a camera of its own. Clicking that overlay opens the other camera with its timeline and recordings, at the same moment while you review footage, and the camera you came from becomes its overlay.
Streaming modes
You set the streaming mode per camera in its settings, where a new camera starts on Auto. The player also has a button to switch between WebRTC and MSE while you watch.
- Auto starts WebRTC and MSE together and keeps whichever connects first, so a network that blocks WebRTC still gets a picture. After falling back to MSE it tries WebRTC again in the background now and then and takes over once it connects. When the camera's codec cannot travel over WebRTC it goes straight to MSE.
- WebRTC gives the lowest latency.
- MSE is a broadly compatible fallback.
- webrtc/tcp sends WebRTC over TCP only. Pick it in the camera settings if some networks block the ports WebRTC normally uses. It is not available from the player button.
The setting applies to the camera view. The small players elsewhere, the zone editor, shortcut previews, the floor plan hover and the event dialog, always run on Auto.
An MJPEG camera plays as MJPEG in every mode, in the browser, the mobile apps and the Apple TV app. The picture arrives as single JPEG frames, the sound, if the camera has any, over MSE. Recording takes MJPEG as it is.
Activity mode: Always On and Standby
Each camera has an Activity mode that controls when its stream runs:
- Always On keeps the stream live while the player is in view.
- Standby keeps the stream off until you click the video. It stops again a few seconds after your last click or after the picture appears, whichever is later. It stays on while you use the intercom, the PTZ controls, fullscreen, Picture-in-Picture or a menu of the player.
- Activity keeps the stream running while there is activity and lets it rest otherwise.
The setting applies to the camera view and to the Home Assistant camera card in live mode. Camview and the Home Assistant view card follow it too, unless they are set to one mode for the whole view. The small players elsewhere always stay on: the zone editor, shortcut previews, the floor plan hover and the event dialog.
Whatever the mode, a player scrolled out of view stops after about 10 seconds and shows its last picture until you scroll back, then starts again. The intercom, the PTZ controls, fullscreen, Picture-in-Picture and an open player menu keep it running, as in Standby.
Shortcuts
Shortcuts are controls you place on the video to jump to another camera or operate a sensor. Turn on Edit Shortcuts on the player to add them. See Shortcuts.
The toolbar
The bar under the player holds Shortcuts, Ask the assistant, Play on another screen and, for admins, Settings, next to two menus. Layers toggles what shows over the picture: Detections on cameras that run motion or object detection, Zones, Heatmap, and AI descriptions when the NVR plugin is installed. The dots hold Capture snapshot, and for admins Share Camera and, during playback, Show detection trace. Ask the assistant shows once the assistant is set up, on a phone on the timeline next to the microphone. See Detection & AI.
Cameras with pan, tilt and zoom get their own bar at the top right of the player, with the home position, the presets saved on the camera, and the PTZ button for the on-screen controls. See PTZ & autotrack.
Symbols on the player
Symbols at the top right of the player tell you about the stream. Hover or tap one for its text. They hide while the on-screen PTZ controls are open.
- Red circle. Live view is unavailable, the text gives the reason. The spinner shows that camera.ui keeps trying.
- Red info symbol. The player shows another quality than you picked, because this device cannot play H.265 for example.
- Cloud. Live view runs through the relay. Admins only.
- White info symbol. No direct connection formed, so live view has more delay. Switching on the relay can help. Admins only, while the relay is off.
The camera page
Open camera (or selecting a camera from the list) opens its full page: the live player, a Recordings tab, a list to switch between Cameras, Shares for admins, and a Timeline panel for jumping through footage. The player takes up to half the height, a wide picture less, and the tabs get the rest. Drag the handle between the player and the tabs to give either more height; the browser keeps that split, a double-click on the handle resets it. The Settings cog (admins) opens the camera settings drawer, where a camera's sources, zones, PTZ, detection, and more live.
The Recordings tab lists the camera's events like the Recordings page: objects, sensors and alarm sounds, and motion too on a camera without object detection. The filter button at its bottom right narrows the list by text, day, confidence, label, the camera's sensors and sounds, and vehicle color and type. With a label, sensor or sound picked, the list shows exactly that, Motion for example. Each camera keeps its pick with your account, text and day are not saved. The button above it turns on the zone filter: mark areas on the camera picture, the timeline filters by the same zone.
To watch several cameras at once, use Camview.