
Adding a camera
There are two ways to add a camera: let camera.ui discover it, or add it manually with its stream URL. Both start from the Cameras page.
Before you start
- The camera is on the same network as your server.
- For network discovery, enable ONVIF in the camera's own settings.
- Have the camera's username and password ready. For a manual add, also have its RTSP URL (from the camera's manual or app).
Discover a camera
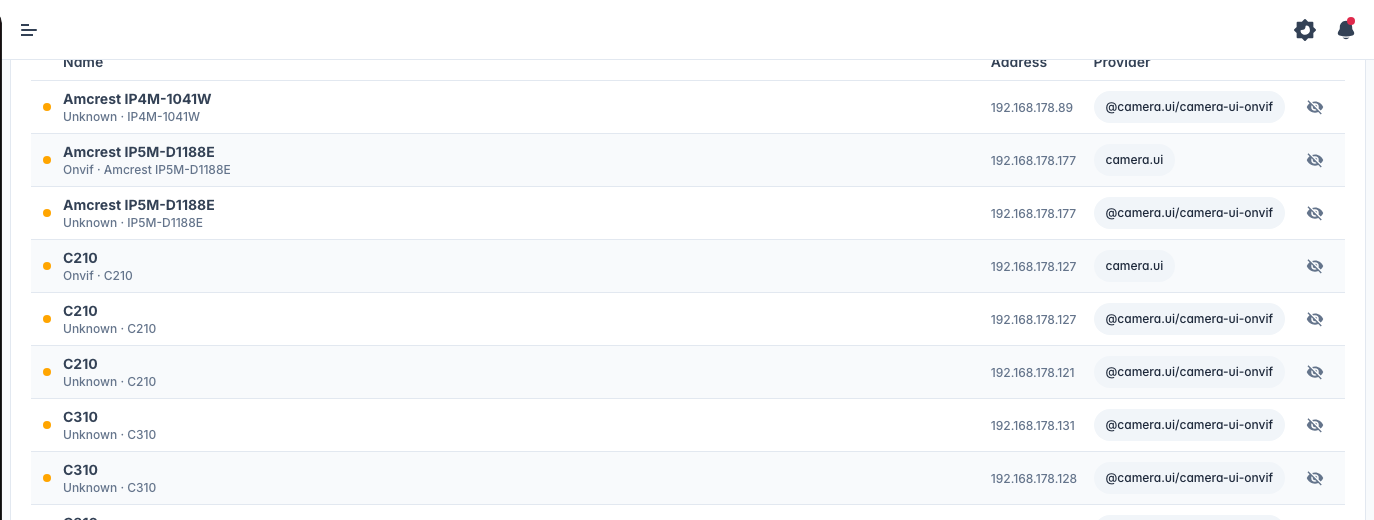
The Cameras page lists devices that have been discovered, ready for you to add. A camera shows up here when camera.ui's built-in discovery finds it on your network (ONVIF and other protocols), or when a plugin that manages cameras reports one. Cameras you have already added appear under Adopted cameras. Discovery and adding are for admins; other users open the same Cameras page as a plain list and tap through to any camera.
- Open Cameras. Discovery runs automatically. If a camera doesn't appear, select Rescan.
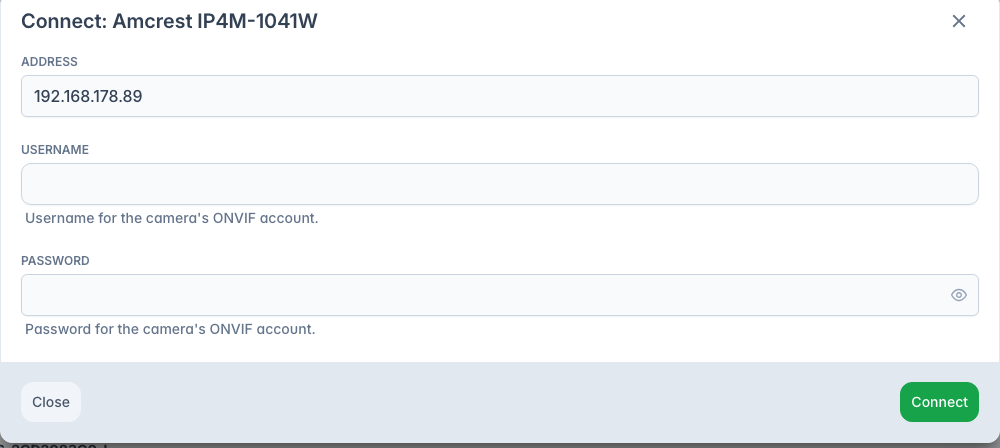
- Select a camera under Discovered. If asked, enter username and password (a few cameras use a PIN) and select Connect.
- Confirm camera shows the Name, Room and Sources camera.ui read from the camera. Adjust them if needed.
- Select Add camera. The camera moves to Adopted cameras.
A plugin also tells camera.ui whether a camera runs on battery and whether it is a doorbell. A battery camera is added so it can sleep: hot mode off, new pictures Only on request, live view in Standby and Ad-hoc recording. A doorbell is added as a doorbell.
The eye icon hides a device; Show hidden devices brings it back.
Add a camera manually
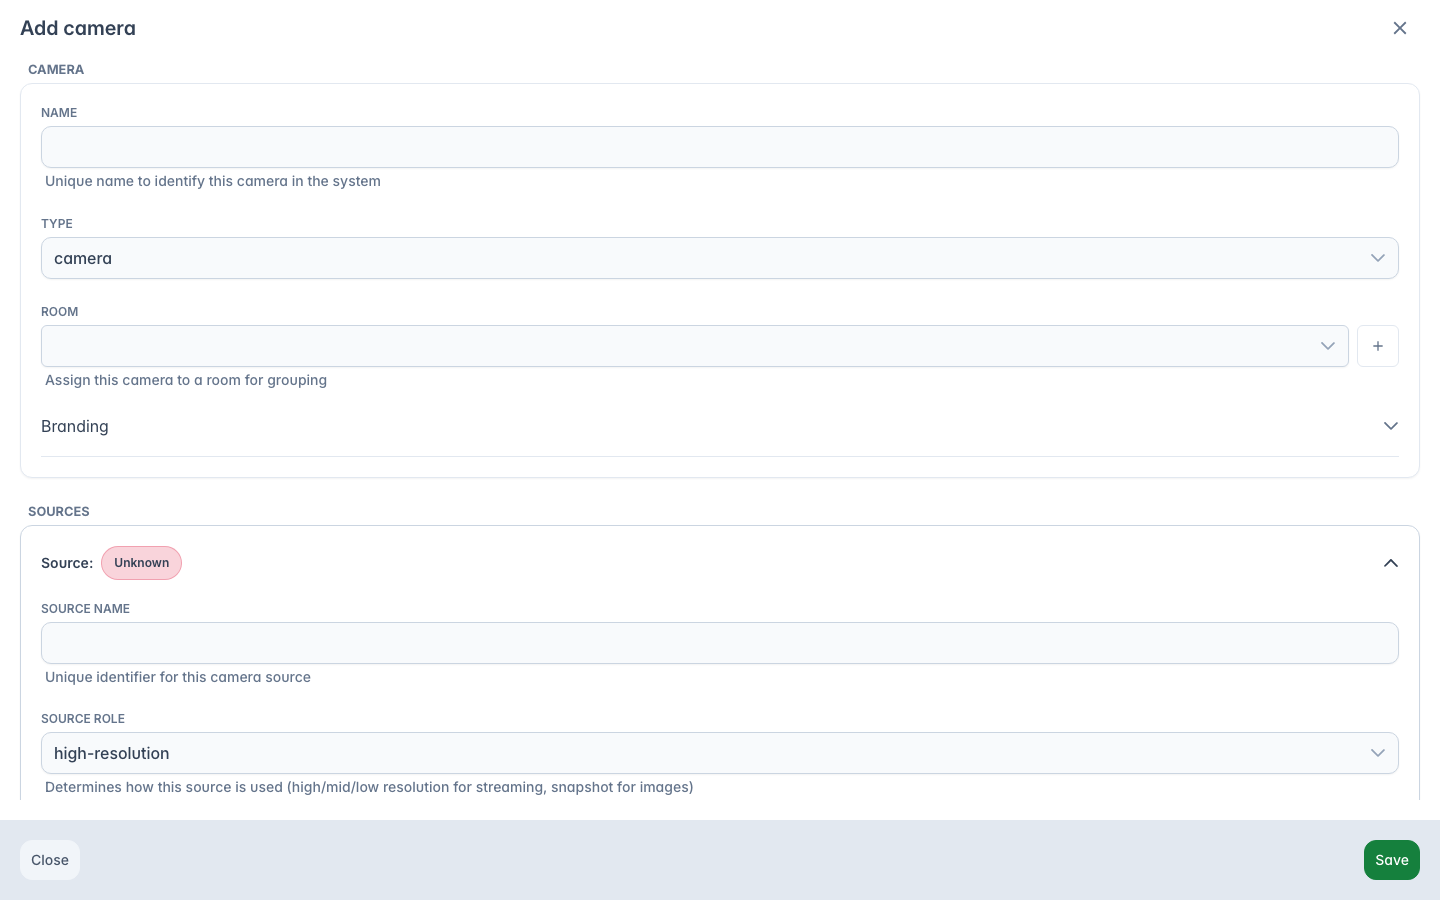
For cameras that aren't discovered, or to set up streams yourself, select Add camera on the Cameras page.
- Give the camera a Name, and optionally assign it to a Room.
- Under Sources, set up at least one stream:
- Enter a Source name.
- Pick a Source role: High Resolution, Mid Resolution, or Low Resolution for streaming, or Snapshot for stills. At least one streaming role is required.
- Paste the full stream URL including the protocol, for example
rtsp://user:pass@192.168.1.50:554/stream. camera.ui detects the protocol from the URL and shows Detected protocol under the field. Use the (i) button next to the field for protocol-specific help, or Test camera source to preview a frame.
- Select Add source to add another URL to the same source. To add a second source with another role, for example a low-resolution stream for fast scrubbing, use the plus button below the Sources card.
TIP
The NVR plugin, if installed and enabled, is activated for every new camera automatically, whether you added it manually or adopted it from Discovered. Recording then starts on its own as long as your subscription has a free camera slot. You can change the mode or turn recording off per camera, see Recording.
Sources and roles
A camera can have several sources, each with a role:
- High / Mid / Low Resolution are streaming tiers. camera.ui uses the one that fits the situation, such as a low-resolution stream in a multi-camera grid and a high-resolution one at full screen.
- Snapshot provides still images.
One source is enough; a lower-resolution stream makes grids and playback lighter. Each source needs its own name within the camera; a name already in use is rejected with a note under the field. Once a source is saved its name is fixed.
Source options
- Use for snapshot. The camera's snapshots come from this source: the cards, Home Assistant, HomeKit, automations and the API. A source with the Snapshot role always comes first. Without either, snapshots come from the lowest resolution stream, so turn this on for the main stream if you want sharper ones.
- Hot mode. Keeps the connection to the camera always active, so there's no reconnect delay when a stream is opened.
- Preload. Preloads the stream so the camera view opens with minimal delay.
- Audio track. Switched off, the audio track of this source is removed. On by default.
- Two-way audio. Switched off, the talk channel of this source is removed and camera.ui no longer requests it from the camera. On by default.
- Stream timeout. Seconds without video before the stream is reconnected. Left empty it is 5 seconds for a camera you entered yourself and 60 for a source a plugin provides, since the plugin already watches its camera.
- Connection timeout. Seconds the camera gets for each step of connecting. Raise it for cameras that wake up slowly, a battery model for example. Empty means 5.
With hot mode and preload on, opening a stream is near-instant, whether the camera uses H.264 or H.265.
Connection protocols
RTSP works with almost any IP camera and is the usual choice, while ONVIF powers discovery. The protocol list also covers specific brands and systems, some of which connect directly and others through a plugin. See Connection protocols for the full list.[1]
Cameras that depend on a vendor cloud (such as Ring or Nest) can be connected, either directly or through a plugin, but they are not recommended and not covered by support. Use local RTSP / ONVIF cameras for a reliable experience. ↩︎